








Quick answer: a 4-wire track rail is a multi-circuit lighting track with four conductors, typically three line conductors (L1, L2 and L3) and one shared neutral, which together provide three independently switchable or dimmable circuits on one rail. Protective earth is usually carried by the aluminum profile. Each track adapter has a selector that connects the fixture to one of the three circuits, so fixtures on the same rail can belong to different lighting groups. The rail can be fed from three switched lines of a single-phase supply or, in some installations, from three phases, which requires extra care with voltage and neutral loading. Control options range from simple switching per circuit to per-circuit dimming, building automation and wireless fixture control.
How this guide differs from buying guides: purchasing steps, RFQs and sample approval for 4-wire rails are covered in the 4-wire track rail buying guide, and the choice between single-circuit and multi-circuit systems in éclairage sur rail à circuit unique ou à circuits multiples. This article explains how a 4-wire rail is laid out electrically, how it is fed and balanced, which control methods work with it, and how adapters select circuits.
What is a 4-wire track rail?
A 4-wire track rail is an aluminum lighting track that contains four insulated conductors in an insulating carrier, arranged so that fixtures can draw power from one of several circuits. In the most common configuration, three conductors are line conductors and one is a common neutral, giving three circuits that share the neutral. The aluminum profile provides the mechanical structure and usually acts as the protective earth path through earth contacts in feeds, joiners and adapters.
The term 4-wire is often used interchangeably with three-circuit track, but the two terms describe different things: wire count describes conductors, while circuit count describes how many independently controlled groups the rail provides. A 4-wire rail usually provides three circuits, but buyers should always confirm the conductor assignment, because some systems use conductors differently. The relationship between wire count and circuits is explained in LED track rail types explained.

How are the conductors laid out inside a 4-wire rail?
The conductors inside a 4-wire rail are usually arranged in two pairs on opposite inner walls of the profile, with the neutral on one side and the line conductors distributed so that the adapter contacts can reach each of them. A polarity marking on the profile, often a groove or line along one side, identifies the neutral or earth side. Feeds, joiners and adapters are designed to meet this layout in one orientation only.
Because the layout is fixed, every component must keep the same orientation along the run. A joiner or corner connector installed the wrong way round can swap circuits or break the neutral in the next rail. The profile families that define these layouts, often referred to as H, J and L types for multi-circuit track, are explained in the H-type vs J-type vs L-type compatibility guide.
| Conductor | Typical function | Notes |
|---|---|---|
| L1 | Line for circuit 1 | Switched or dimmed independently |
| L2 | Line for circuit 2 | Switched or dimmed independently |
| L3 | Line for circuit 3 | Switched or dimmed independently |
| N | Common neutral | Carries return current of all circuits |
| Profile (PE) | Protective earth | Bonded at the feed, continuous through joiners |
How does a 4-wire track rail work?
A 4-wire track rail works by bringing three separately controlled line conductors and a common neutral along the full length of the rail, and letting each fixture choose which line it connects to. The supply panel provides three outgoing lines, each through its own switch, dimmer or control device, plus the neutral and earth. These are connected to the matching terminals of the live end feed. When a fixture’s adapter is locked into the rail, its neutral contact touches the neutral conductor, its earth contact touches the profile, and its line contact touches whichever line conductor the selector is set to.
Because the selection happens at the adapter, a fixture can be moved from one lighting group to another without rewiring, simply by changing the selector position. This is what makes 4-wire rails useful in retail, galleries and hospitality, where displays and scenes change frequently. A practical comparison of two-circuit and three-circuit systems is available in 2-circuit vs 3-circuit track lighting.
How is a 4-wire track rail wired at the feed?
A 4-wire track rail is wired at the live end feed by connecting the three line conductors from the control devices to the L1, L2 and L3 terminals, the neutral to the N terminal and the protective earth to the earth terminal. The terminal markings on the feed must be followed exactly, and the feed must be inserted into the rail in the orientation indicated by the polarity marking. Middle feeds and additional feed points use the same assignment.
Clear labeling at the distribution board and on drawings is essential: each circuit should be identified by its function, such as window display, wall accent or ambient, so that maintenance staff and future fit-out teams know which line controls which group. A mains connection must be made by a qualified electrician following local regulations. Installation steps are explained in how to install a surface-mounted track lighting rail.
Should a 4-wire rail be fed from one phase or three phases?
A 4-wire rail is most commonly fed from one phase, with the three line conductors supplied through three separate switches, relays or dimmers from the same phase. This keeps the voltage between any two line conductors close to zero and makes the system simple and safe for standard fixtures. In some commercial installations, the three line conductors are fed from three different phases to distribute load across the building supply.
Three-phase feeding requires extra care for two reasons. First, the voltage between line conductors of different phases is higher than the phase-to-neutral voltage, for example around 400 V between phases on a 230 V phase-to-neutral system, so the rail, feeds, joiners and adapters must be rated for that voltage and the installation must meet local rules for multi-phase circuits, including isolation of all lines together. Second, LED drivers draw non-sinusoidal current, and harmonic currents from the three phases can add up in the shared neutral instead of cancelling, so the neutral can carry more current than expected. Many designers therefore prefer single-phase feeding for lighting rails unless the manufacturer and the electrical designer have confirmed three-phase suitability.
| Feeding method | Advantages | Points to check |
|---|---|---|
| Single phase, three switched lines | Simple, low inter-conductor voltage, common practice | Total load on one phase and one neutral |
| Three phases | Spreads load across phases | Voltage rating between lines, neutral harmonic current, isolation rules |
How should load be balanced across the three circuits?
Load on a 4-wire rail should be planned so that each circuit stays within its rated current, the shared neutral stays within its rating, and the feed and joiners are not overloaded. Each line conductor and the neutral have a current rating stated by the manufacturer. When all three circuits are fed from the same phase, the neutral carries the sum of the three circuit currents, so the total load of all three circuits must not exceed the neutral and feed rating.
To estimate load, add the input wattage of all fixtures assigned to each circuit and divide by the supply voltage. For example, a rail with eight 30 W spotlights on circuit 1, six 30 W spotlights on circuit 2 and four 40 W wall washers on circuit 3 at 230 V draws about 1.0 A, 0.8 A and 0.7 A, or about 2.5 A in total on the neutral. This is well within typical ratings, but long runs with many fixtures, pendants or high-power heads should always be checked. Load planning guidance is also included in the 4-wire buying guide.
Which control options work with a 4-wire track rail?
A 4-wire track rail supports several control options because each of its three circuits can be controlled independently. The simplest option is on/off switching of each circuit with wall switches, relays or contactors. Per-circuit dimming uses one compatible dimmer per circuit with dimmable LED drivers. Building automation systems can switch or dim each circuit on schedules, scenes or occupancy signals. Wireless fixture control adds individual control of each head on top of the circuit grouping.
| Control option | How it works | Best suited for |
|---|---|---|
| Switching per circuit | Switch, relay or contactor on each line | Simple zoning, opening and closing modes |
| Phase-cut dimming per circuit | One dimmer per line, dimmable drivers | Scene setting in shops and restaurants |
| Building automation | Controller switches or dims lines on schedules | Chains, offices, energy management |
| Wireless fixture control | Receiver in each head, controlled by app or gateway | Individual aiming of light levels per fixture |
| Dedicated control bus | Separate control conductors in rails designed for it | Digital addressable lighting on multi-conductor rails |
A standard 4-wire three-circuit rail does not include dedicated control conductors, so wired digital protocols such as DALI to individual fixtures normally require a rail that provides extra conductors for the control bus, or wireless control in the fixtures. The Guide-rail à 6 fils explains rails with additional conductors.

How do adapters select a circuit on a 4-wire rail?
Adapters select a circuit on a 4-wire rail with a mechanical selector, usually a rotary dial, slide or lever marked with circuit numbers. Turning the selector moves the line contact so that it touches L1, L2 or L3 when the adapter is locked. Many adapters also have an off or zero position, and some require the selector to pass through zero before moving to another circuit. The neutral and earth contacts remain fixed.
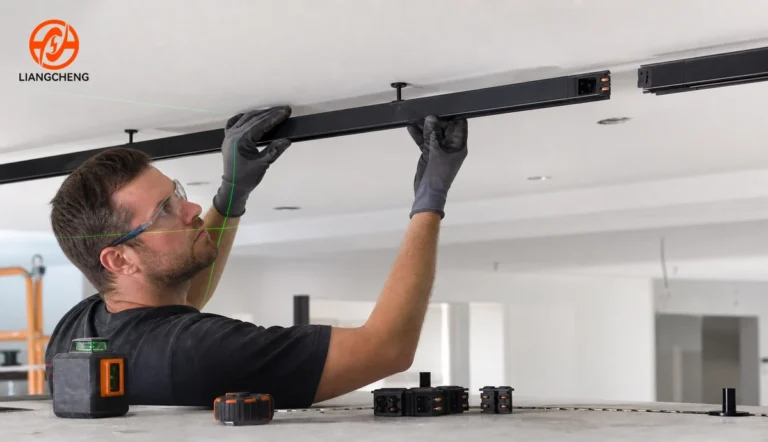
The typical installation sequence is: set the selector to the required circuit, retract the contacts with the locking lever, insert the adapter into the rail with the polarity mark on the correct side, then turn the lever to lock the adapter and engage the contacts. Changing a fixture’s circuit later only requires switching off power, adjusting the selector and relocking. Pendant adapters and adapters for linear fixtures use the same principle. Adapter verification is described in the track light adapter compatibility checklist.
Which fixtures and adapters are compatible with a 4-wire rail?
Fixtures and adapters are compatible with a 4-wire rail only when the adapter matches the rail’s profile family, conductor positions and earth contact, and is rated for the rail’s voltage and current. Multi-circuit adapters from one profile family generally do not fit rails from another family, even though the rails look similar. Single-circuit adapters may physically fit some multi-circuit rails but connect only to a fixed conductor, which removes circuit selection and can create incorrect connections.
Compatibility must be confirmed with physical samples: insert the adapter, test each selector position, verify contact with each circuit under power, check earth continuity and confirm that the adapter locks firmly at several positions along the rail. For projects that combine spotlights, pendants and linear fixtures, every adapter type should be tested on the same rail sample.
Which accessories must match a 4-wire system?
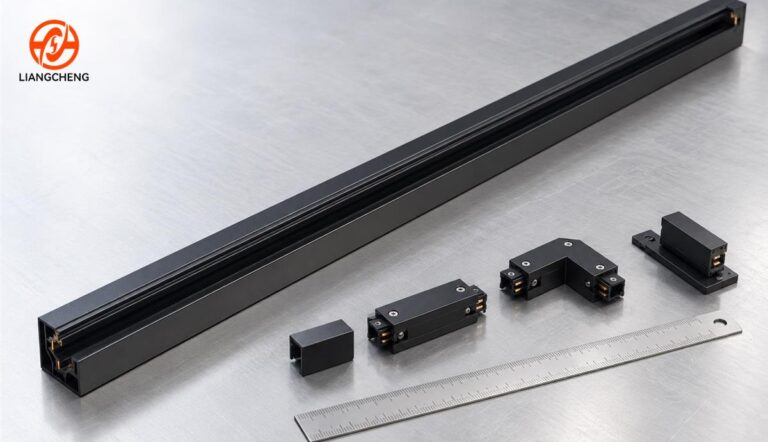
Every accessory that connects to the conductors must match the 4-wire system, because a single wrong part can break a circuit or merge circuits. This includes live end feeds, middle feeds, straight joiners, flexible joiners, L, T and X connectors, end caps and mounting accessories. Connectors must carry all four conductors and the earth continuously, and T and X connectors must route each circuit consistently into each branch.
Using a single-circuit joiner between two 4-wire rails, for example, can leave two circuits dead in the second rail. Corner connectors with an inside and outside orientation must be ordered in the correct version for the layout. A complete accessory list is explained in the track lighting rail accessories system guide.
What are the common specifications of 4-wire track rails?
4-wire track rails share common specifications that define performance and compatibility. The table below shows typical values; exact figures depend on the product and the target market.
| Specification | Common options |
|---|---|
| Circuits | Three circuits plus common neutral |
| Voltage | Mains voltage, typically 100-240 V AC phase to neutral |
| Current rating | Stated per circuit and for the neutral by the manufacturer |
| Conductors | Copper strips or wires in flame-retardant carrier |
| Profile | Extruded 6063 aluminum; profile family H, J, L or proprietary |
| Earth | Through profile and adapter earth contact |
| Terminer | White, black, silver and custom colors; powder coated or anodized |
| Lengths | 1 m, 2 m, 3 m and custom lengths |
| Mounting | Surface, suspended, recessed (profile-dependent) |
Profile sizes are compared in the Guide des dimensions des rails d'éclairage sur rail, and the H type track rail dimensions article covers one common multi-circuit family.
What are the advantages and limitations of a 4-wire track rail?
The main advantage of a 4-wire track rail is flexible zoning: three lighting groups on one rail route, with fixtures that can be reassigned without rewiring. This reduces the number of rails and ceiling penetrations compared with separate single-circuit rails for each group, and it supports scene control in shops, galleries and hospitality spaces. Load can also be distributed across three circuits.
The limitations are higher cost per meter than 2-wire rails, a larger profile, more complex accessories, and the need for careful circuit labeling and commissioning. Adapters are profile-family specific, and three circuits do not provide individual control of each fixture without wireless control. For simple spaces where all lights switch together, a 2-wire rail remains more economical, as compared in 2-wire vs 4-wire track rail.
| Advantages | Limitations |
|---|---|
| Three independent groups on one rail | Higher rail and accessory cost |
| Fixtures reassigned by selector | Adapters tied to profile family |
| Fewer rail runs and feeds | More complex wiring and labeling |
| Supports scene and schedule control | No individual fixture control without wireless |
How are 4-wire circuits typically assigned in projects?
4-wire circuits are typically assigned by lighting task, so that each circuit represents a group that is switched or dimmed together. In fashion retail, a common layout uses circuit 1 for window displays, circuit 2 for wall merchandise and circuit 3 for general or mid-floor lighting, allowing reduced lighting after hours while windows stay lit. In galleries, circuits often correspond to wall washing, accent lighting on artworks and general lighting. Restaurants frequently use circuits for daytime, evening and cleaning modes.
Offices and showrooms may assign circuits to zones near windows, central areas and presentation spaces, which supports daylight-responsive switching. Planning circuit assignment on the lighting drawing before installation, and labeling fixtures with their circuit number, makes commissioning and future changes much easier. Design examples are described in how to design track lighting for fashion retail stores.

How should a 4-wire track installation be commissioned?
A 4-wire track installation should be commissioned by testing each circuit separately and confirming that every fixture responds on its assigned circuit. With all fixtures installed and selectors set according to the drawing, the commissioning engineer switches on circuit 1 alone and checks that only the intended fixtures light, then repeats for circuits 2 and 3. Dimmed circuits are tested across the full dimming range to confirm stable operation without flicker.
Electrical tests should include earth continuity from the feed to the far end of each run, insulation resistance with sensitive drivers disconnected, and verification of the neutral connection at every joint. A commissioning record listing each fixture, its circuit and its position helps maintenance teams later. Flicker troubleshooting is covered in why do track lights flicker.
What are common mistakes with 4-wire track rails?
The most common mistake with 4-wire track rails is mixing components from different profile families, which causes adapters that do not lock, circuits that cannot be selected or swapped conductors at joints. The second common mistake is using single-circuit accessories in a multi-circuit run, which breaks circuits beyond the joint. Incorrect feed orientation is a third frequent cause of fixtures appearing on the wrong circuit.
Other mistakes include feeding three phases without confirming voltage ratings and neutral capacity, overloading the shared neutral, leaving selectors in the wrong position after installation, not labeling circuits at the distribution board, and mixing dimmable and non-dimmable fixtures on a dimmed circuit. Each of these mistakes is avoided with a matched system, a circuit plan, careful commissioning and clear documentation.
Foire aux questions
Does a 4-wire track rail always have three circuits?
Most 4-wire track rails provide three circuits with a shared neutral, but conductor use can vary between systems. The manufacturer’s datasheet should confirm how each conductor is assigned before fixtures and controls are selected.
Can I dim each circuit of a 4-wire rail separately?
Yes. Each circuit can be connected to its own compatible dimmer, as long as all fixtures on that circuit use drivers that work with the chosen dimming method.
Can a 4-wire rail be used with only one or two circuits?
Yes. Unused circuits can be left unconnected at the feed or connected later. This allows a project to start with one or two groups and add the third when needed.
Is earth a separate conductor in a 4-wire rail?
In most 4-wire three-circuit rails, earth is provided by the aluminum profile rather than a separate conductor, with earth contacts in the feed, joiners and adapters. The system documentation should confirm the earthing method.
Can 2-wire track lights be used on a 4-wire rail?
2-wire adapters are generally not designed for 4-wire profiles. Fixtures should use adapters designed for the specific 4-wire profile family so that circuit selection and earthing work correctly.
Source 4-wire track rail systems from Liangcheng Lighting
Liangcheng Lighting manufactures 4-wire track rails and complete multi-circuit systems with matching live end feeds, joiners, corner, T and X connectors, end caps and mounting accessories, including the heavy-duty 4-line aluminum track rail and 3-circuit aluminum track rails. We offer custom lengths, colors and finishes, private-label packaging, adapter compatibility samples and technical documentation for distributors, lighting brands and project contractors. Explore our track rail range and learn more about Liangcheng Lighting.
Planning a multi-circuit track lighting line or project? Send your target market, voltage, circuit plan, lengths, colors, quantities and the adapters you plan to use through the Liangcheng Lighting contact page. Our team will confirm compatibility, recommend feeds and connectors, and prepare samples and a wholesale or custom quotation for your order.
Besoin de solutions d'éclairage sur rail personnalisées ?
Contactez Liangcheng Lighting pour des solutions professionnelles de rails d'éclairage en aluminium en tant que fabricant d'équipement d'origine (OEM) ou fabricant d'équipement d'origine (ODM) et pour un support d'éclairage professionnel.
Connexe